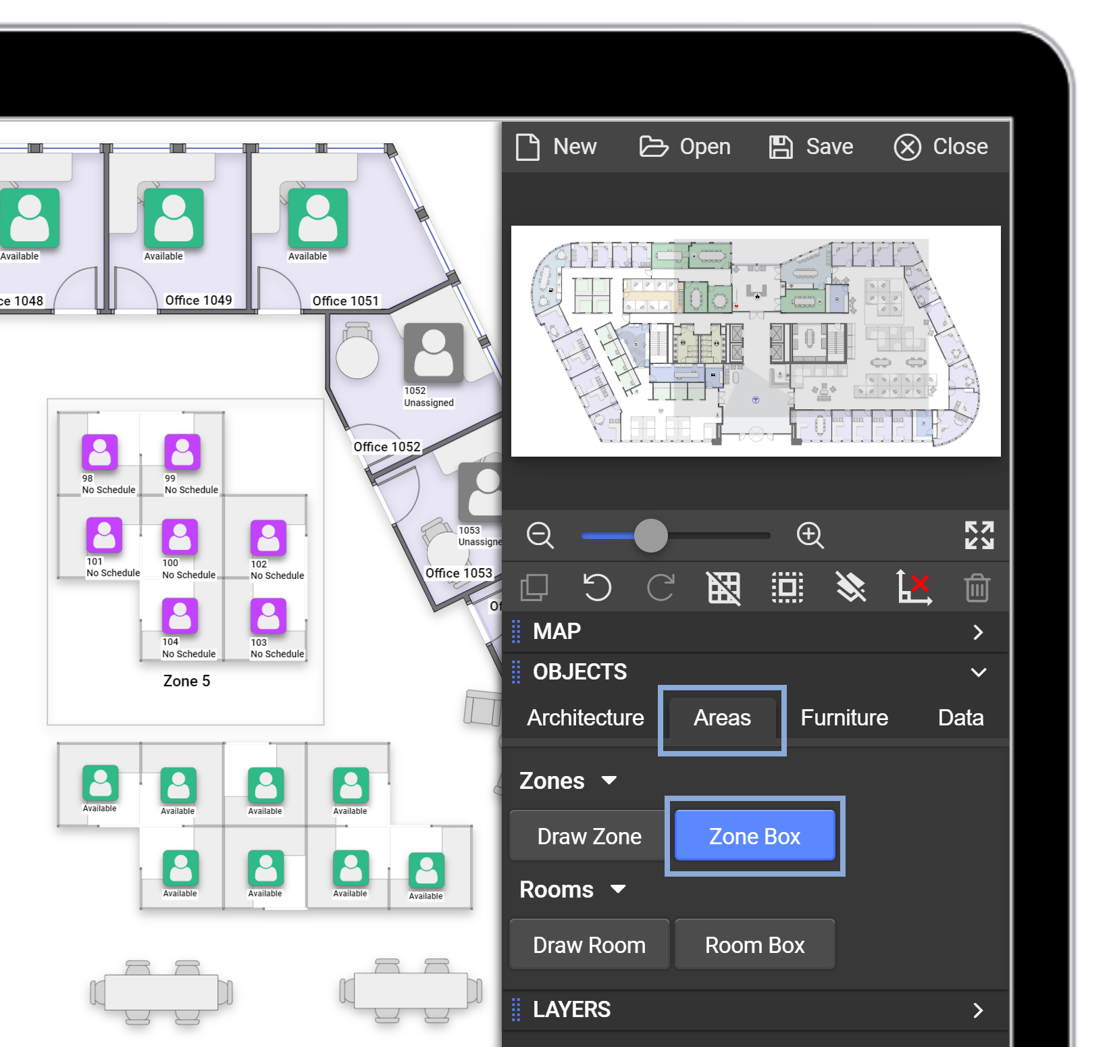
Create a Zone:
The below notes how to create a new zone. Once the zone has been created, you will need to edit the zone characteristics to fit your needs.
- Go to the Objects Tab
- Locate the Areas Tab
- Select “Draw Zone”
- Left click every corner of a zone to draw the outline of the zone
- Right click after the last corner to close the zone
- A new zone will be created
Timestamped Link: Map Editor Basics - Create a Room/Zone
Change Zone Name:
- Select zone of interest
- Locate the Zone Tab (Dynamic Tab)
- Locate the Zone Name textbox
- Type in desired Zone name
- Zone name will automatically appear on the map
Timestamped Link: Map Editor Basics - Change Zone Name
Change Zone Department:
- Select zone of interest
- Locate the Zone Tab (Dynamic Tab)
- Locate the Zone Department textbox
- Select desired department type from the drop-down menu
- Department type will automatically update for that zone
Timestamped Link: Map Editor Basics - Change Zone Department

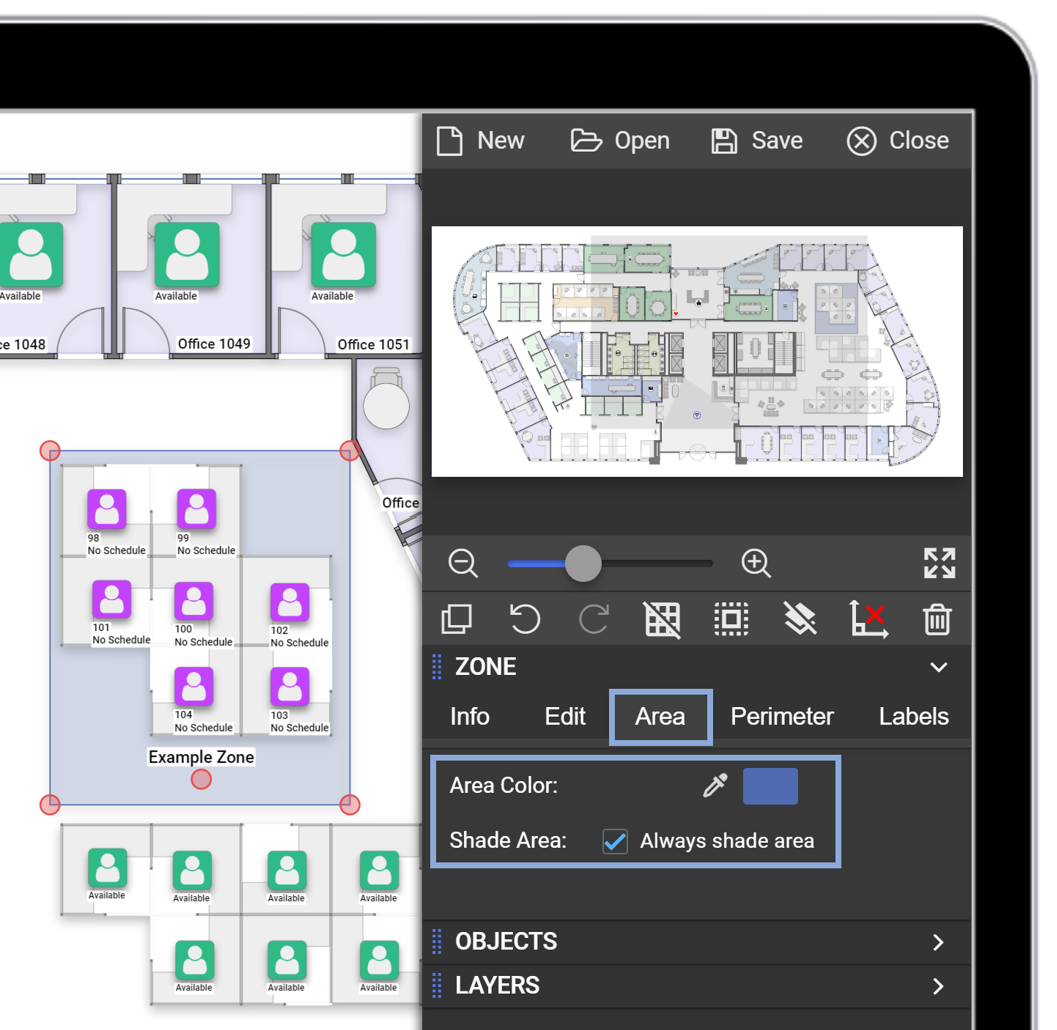
Change Zone Color:
- Select zone of interest
- Locate the Zone Tab (Dynamic Tab)
- Locate the Area Tab
- Select the color selector
- Choose a color
- Press “Enter” or click out of the color selector by clicking on the gray-space in the left-navigation menu
- Choose to “Always shade area” or not
Timestamped Link: Map Editor Basics - Change Zone Color
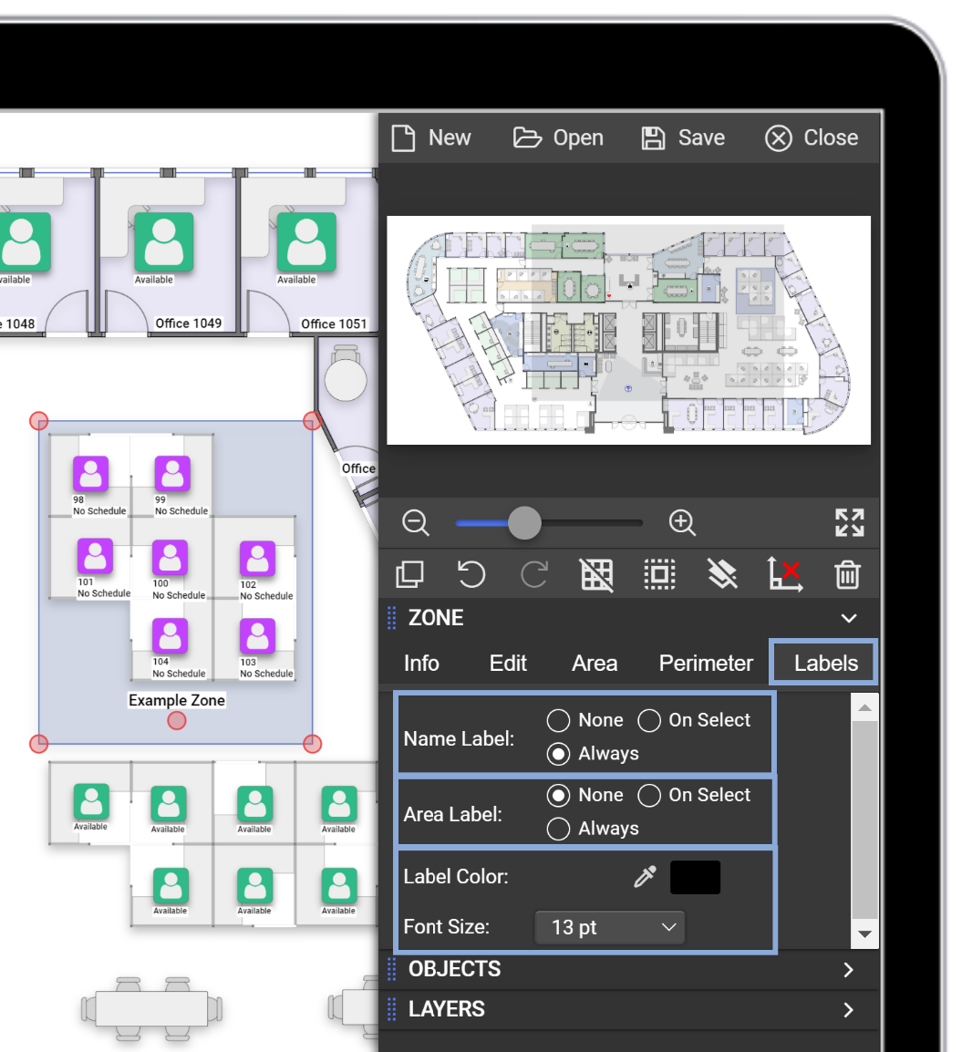
Change Zone Label Size and Color:
- Select zone of interest
- Locate the Zone Tab (Dynamic Tab)
- Locate the Labels Tab
- Select the Font Size drop-down menu
- Select desired font size
- Label color selector is located here too
Timestamped Link: Map Editor Basics - Zone Labels