How to designate a map as a parking map, and add/edit parking spaces.
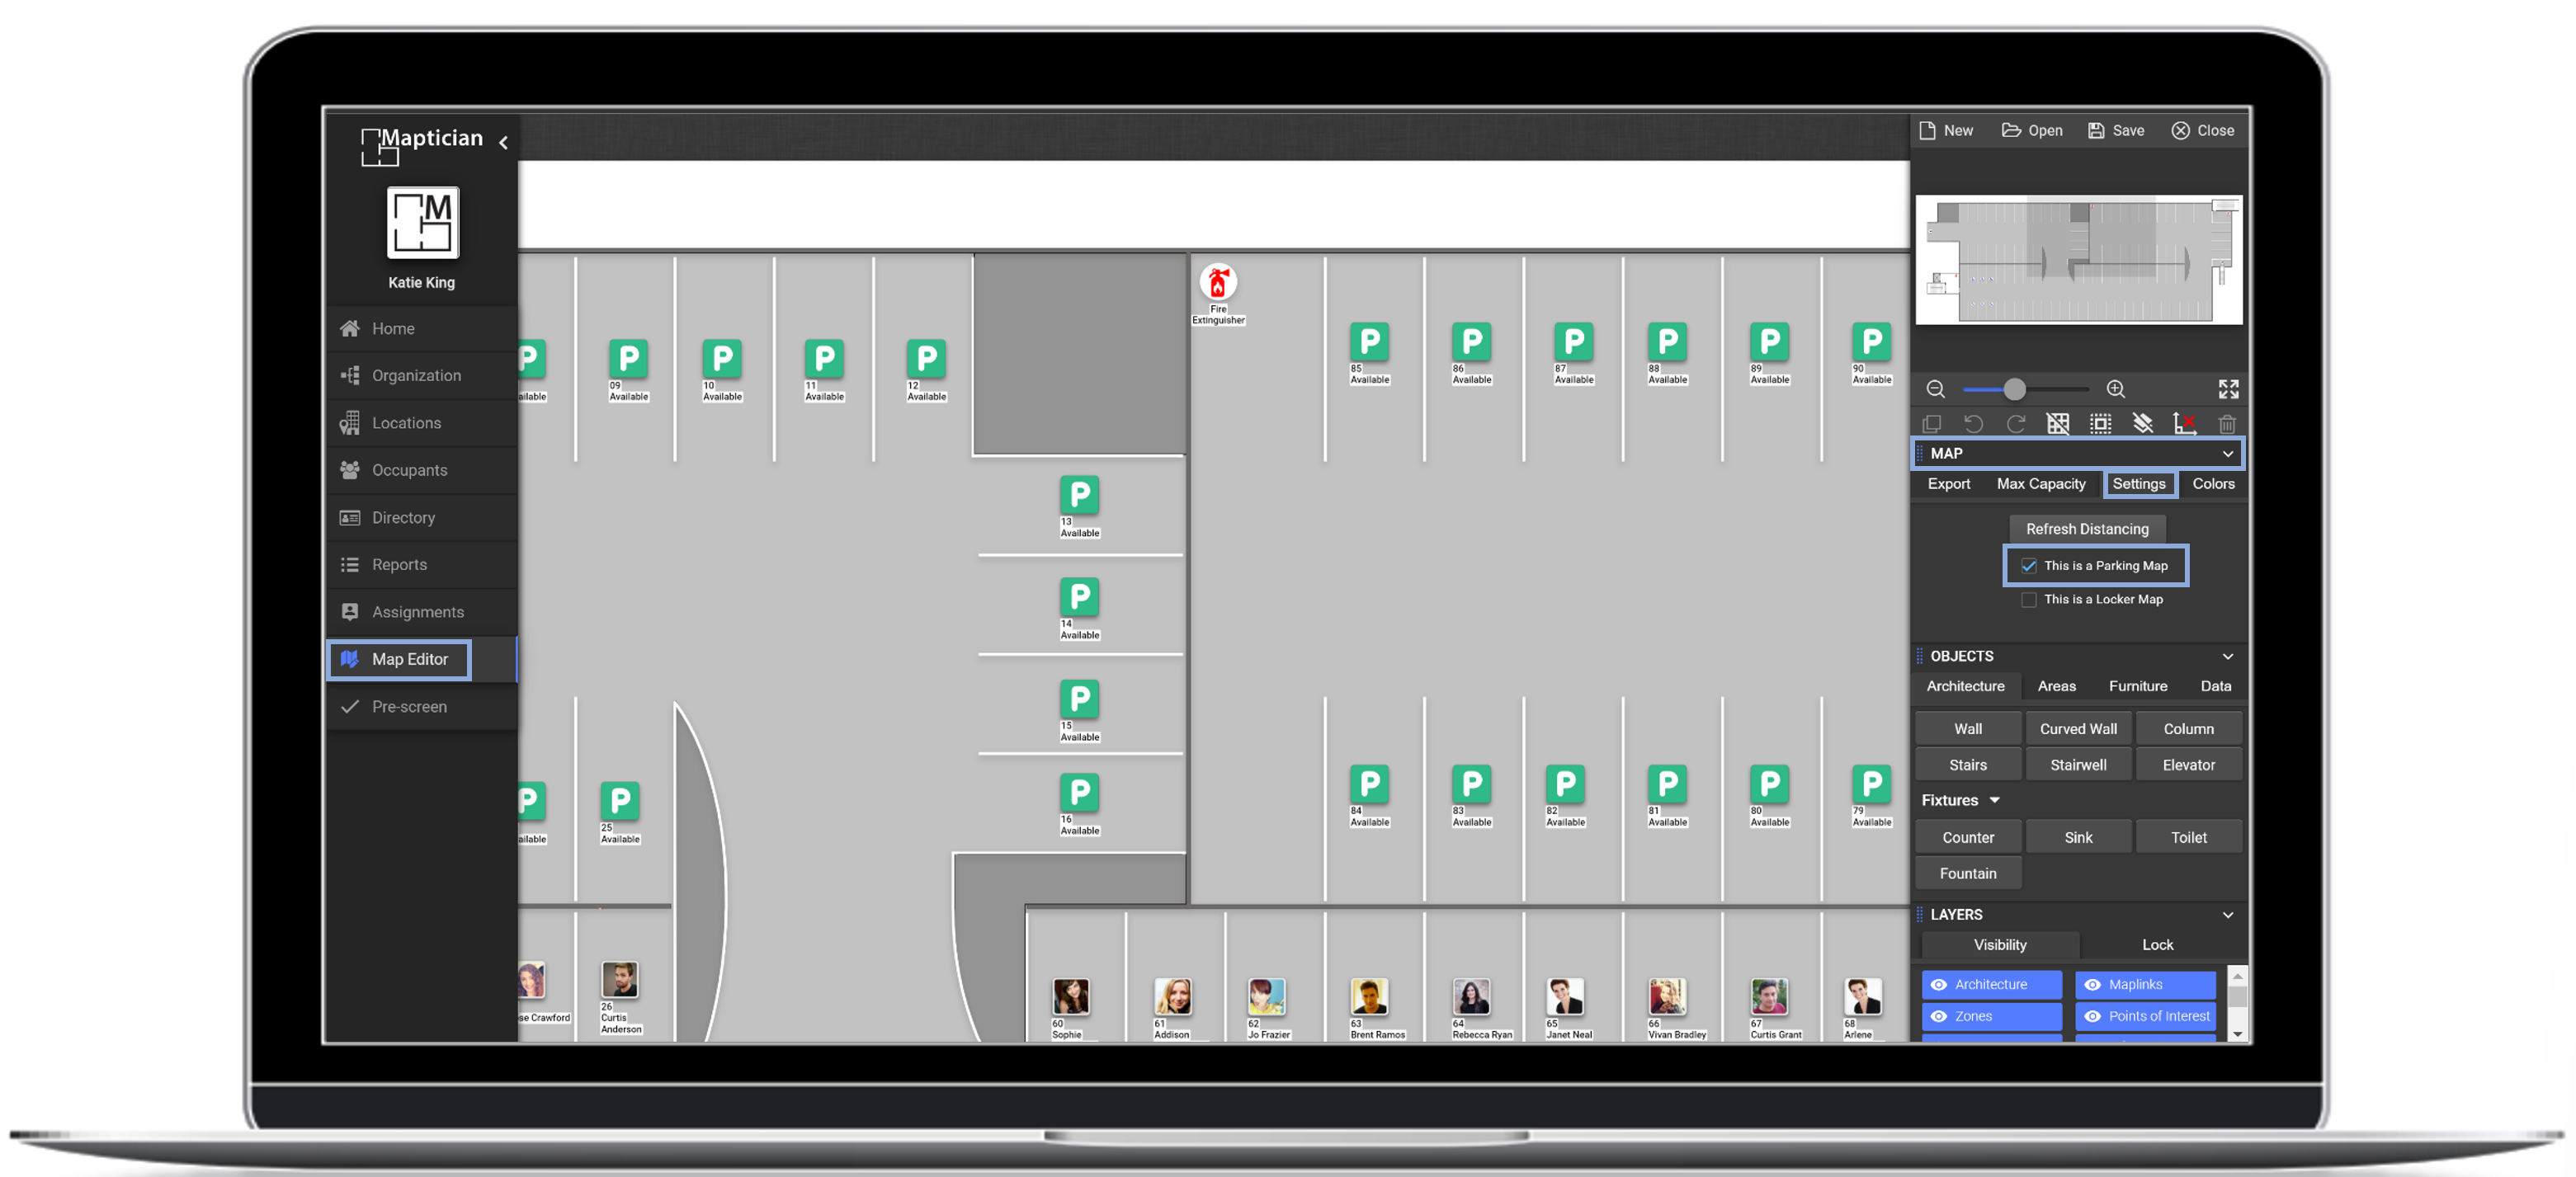
Designate a Map as a Parking Map
Parking maps are typically labeled as such during the map creation process. However, if you need to relabel an existing map, follow the steps below:
- Navigate to the Map Editor tab.
- Click Load Map.
- Select the location and map.
- Click Load to open.
- Click on the white space surrounding the map canvas (make sure no other objects are selected).
- In the Map Menu to the right of the screen, click into the Settings tab.
- Check the This is a Parking Map box.
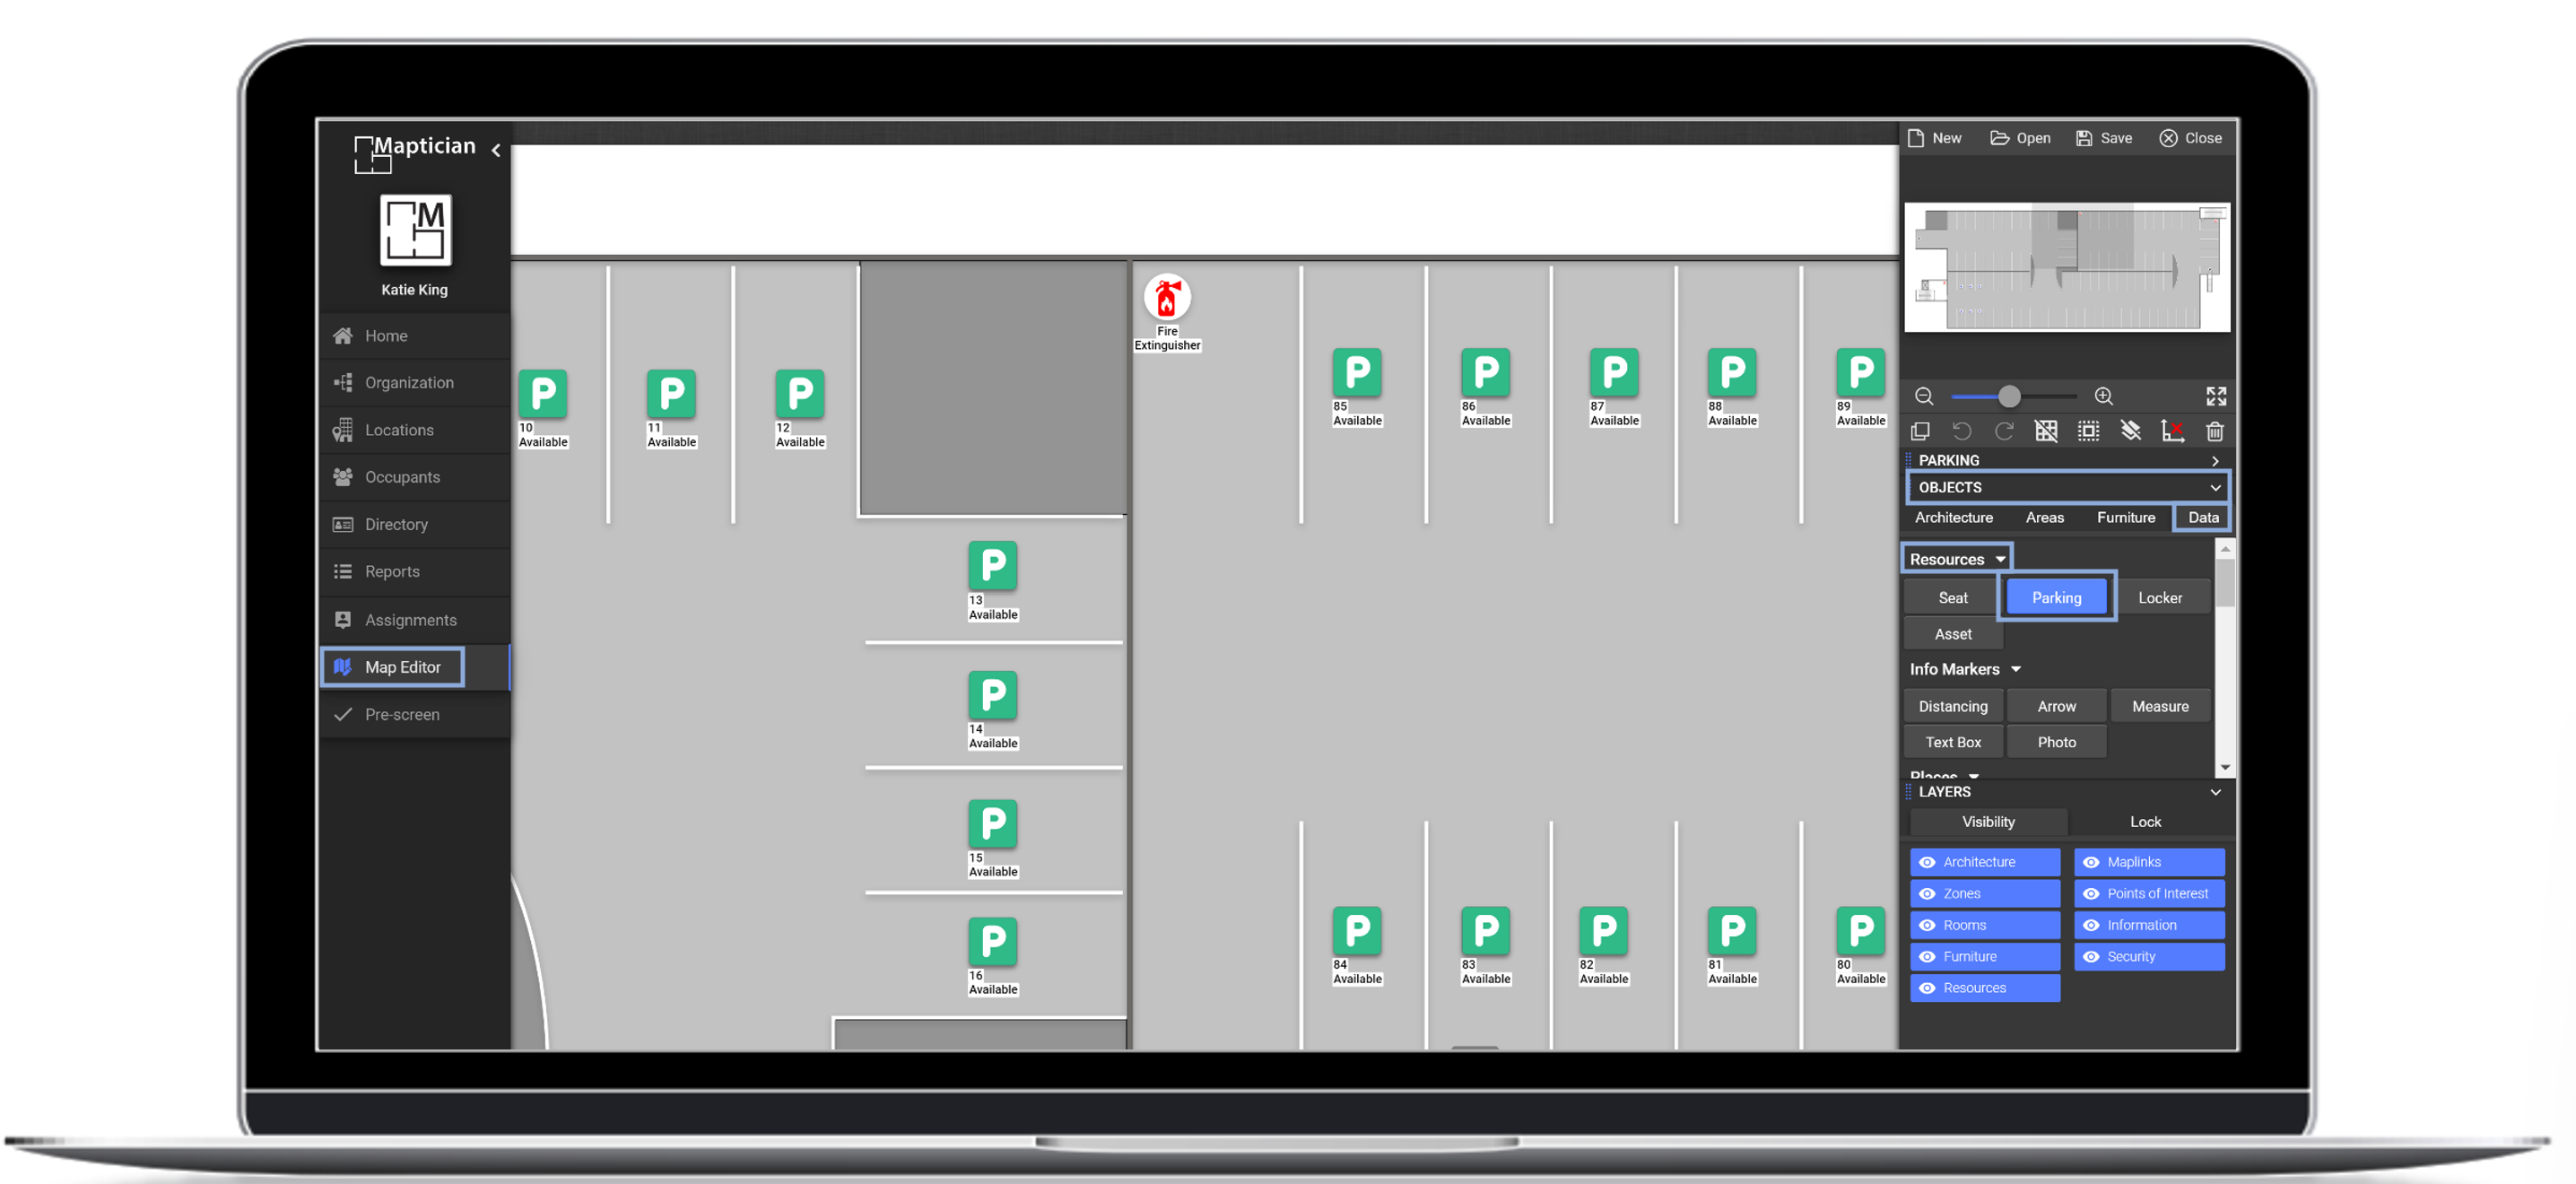
Add a Parking Space
- Navigate to the Map Editor tab.
- Click Load Map.
- Select the location and map.
- Click Load to open.
- In the menu to the right, navigate to the Objects menu.
- Click into the Data tab.
- Under Resources, click the Parking option.
- Hover mouse over the map, and click on the desired location to place the parking space.
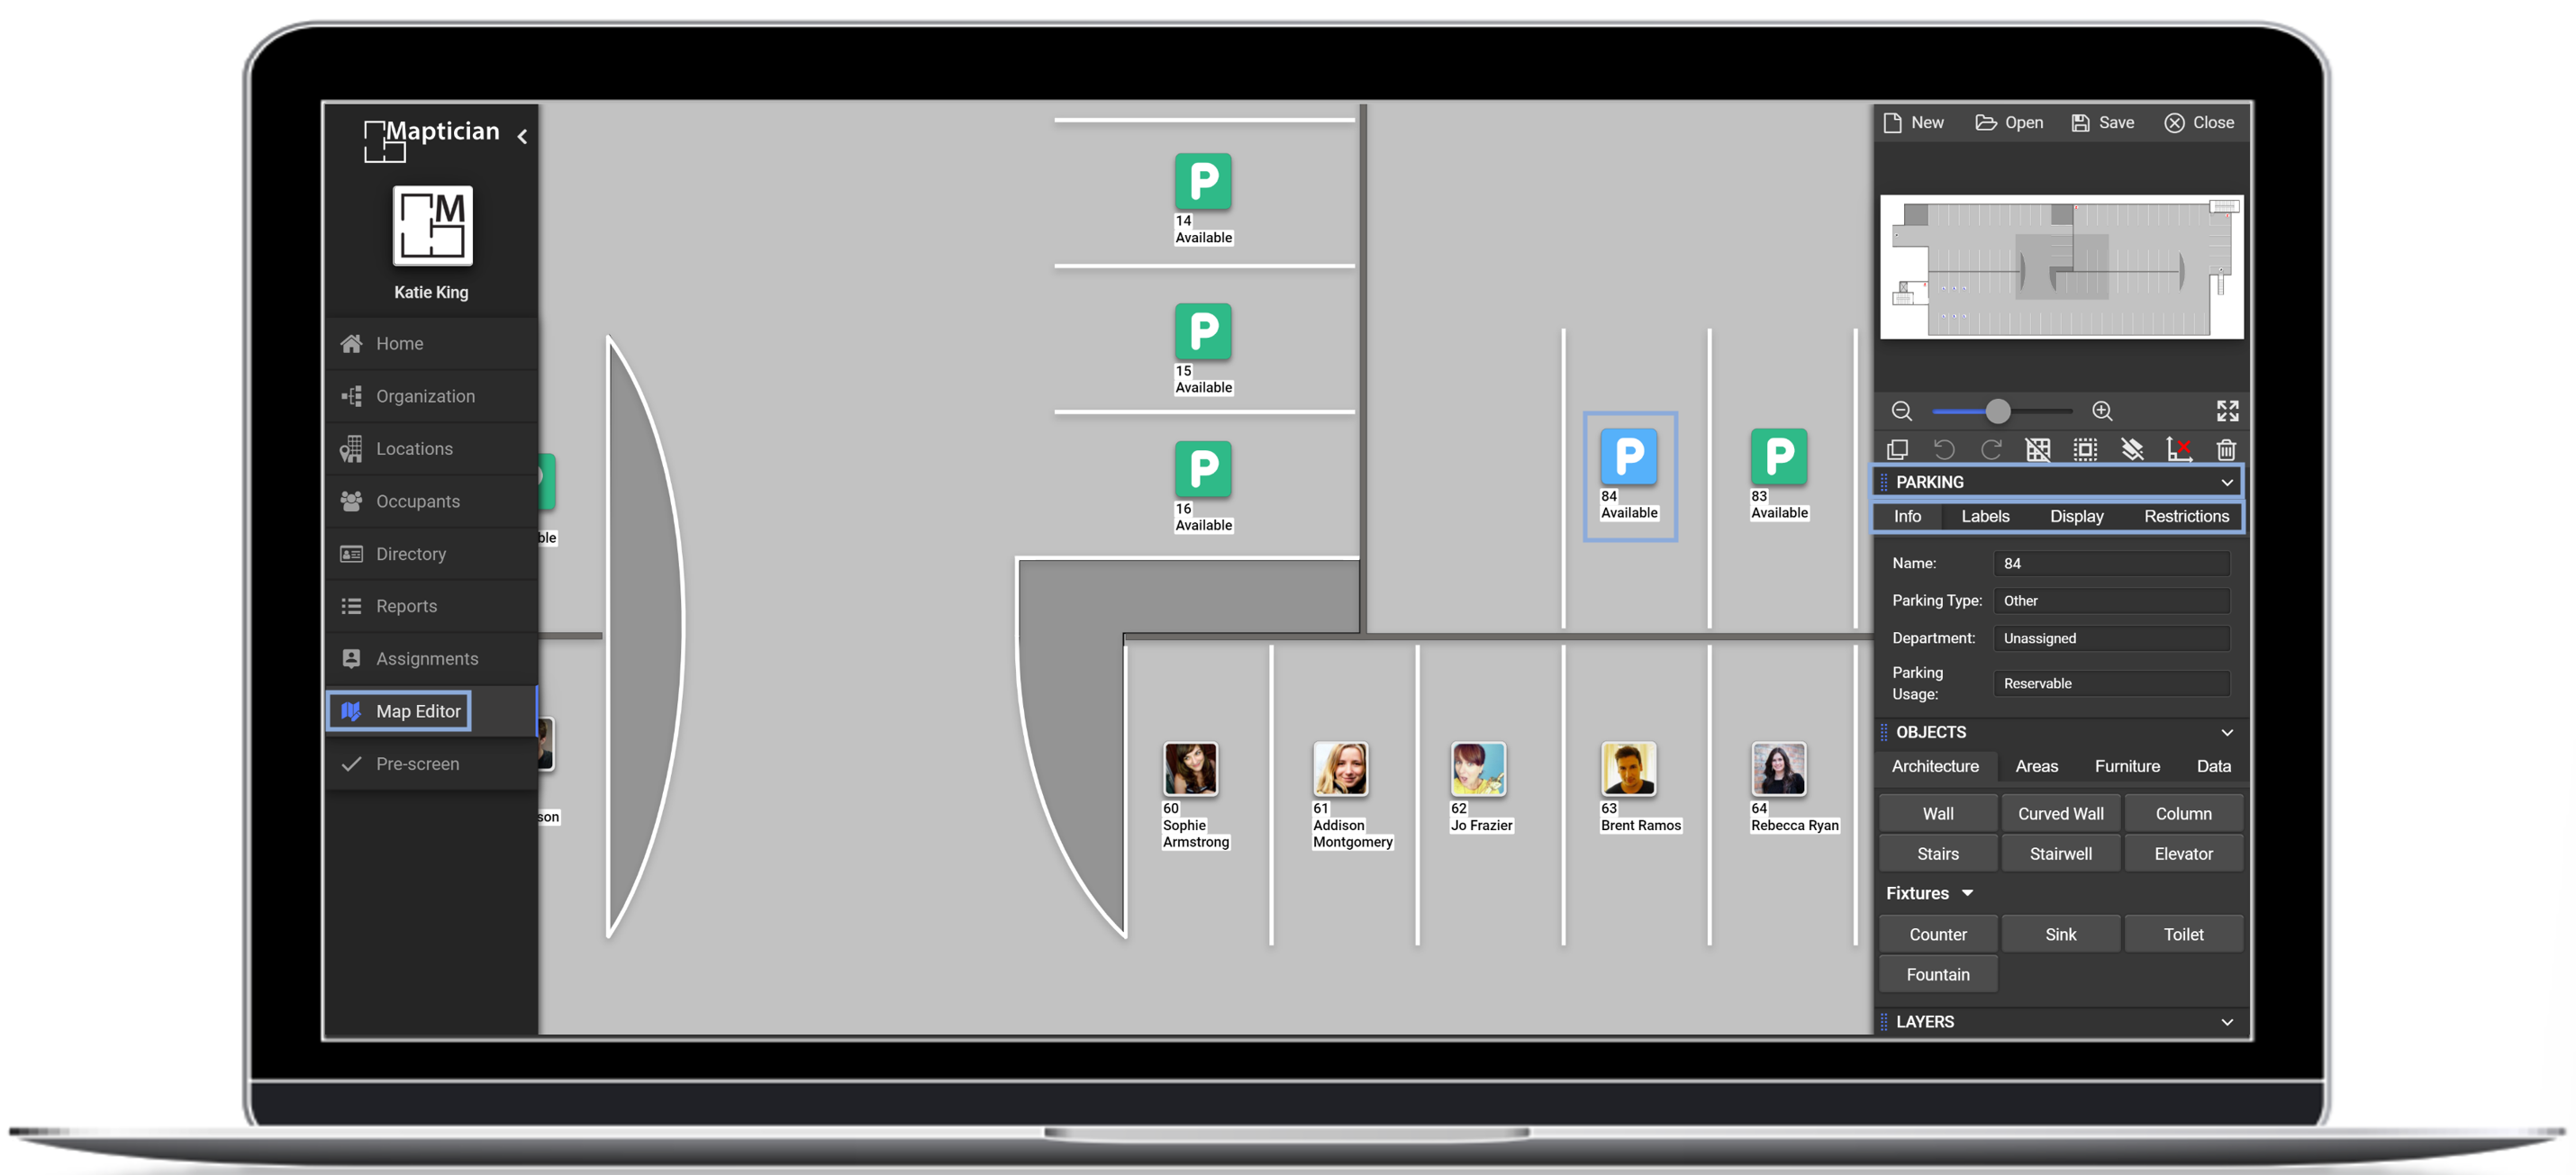
Edit an Existing Parking Space
- Click on the desired parking space.
- In the Parking Menu to the right, you can edit any of the following options:
- Info: Use this tab to change the name of the parking space, type of parking, department designation or the parking space usage.
- Labels: Use this tab to change the visual aesthetics of the parking space label.
- Display: Use this tab to change the parking space size.
- Restrictions: Use this tab to establish restrictions for the parking space. You can restrict by employee, department or time.