
This guide walks through how to sync your Office 365 and Azure Active Directory calendars into one easy-to-manage calendar.
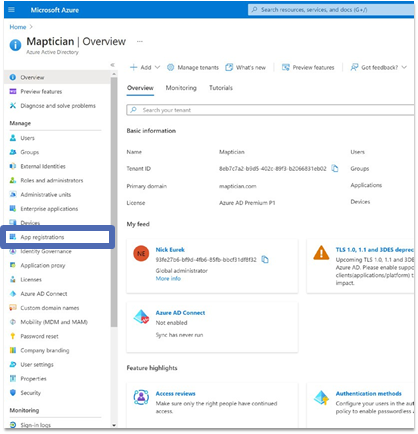
- Open your Microsoft Azure Account Portal and select "Azure Active Directory".

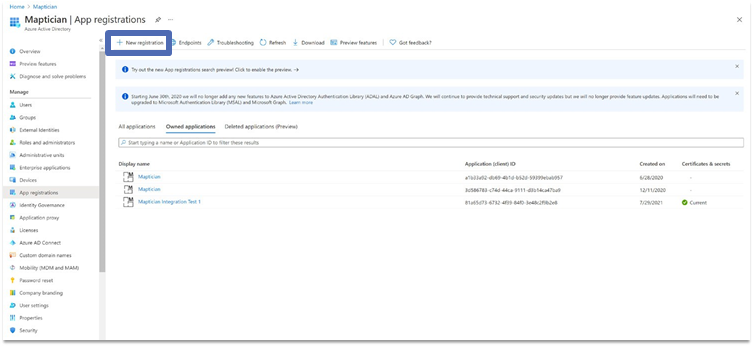
- From your Azure Active Directory home screen, select "App registrations" in the left navigation menu. Maptician will be configured within Azure as a background service or "daemon". App registrations is where we create credentials that allow Maptician to access the Microsoft Graph API for calendar sync.
- In App registrations, press the "New Registration" button.
- In the Register an application form dialog, make the following entries:
- Create a name for the app (Maptician or Maptician Graph API are recommended)
- Ensure that the supported account types are "Single Tenant".
- Once these are complete, press the "Register" button to create the app object.

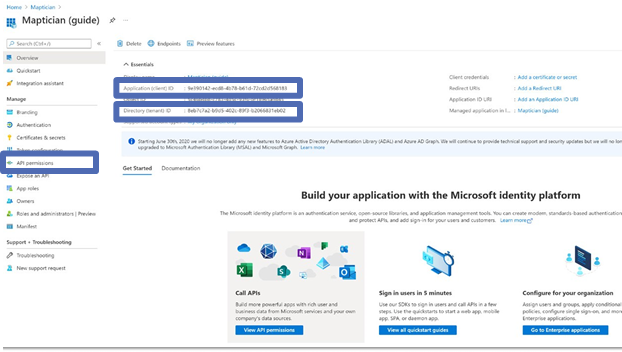
- After the app has been created, copy the "Application (client) ID value" and the "Directory (tenant) ID value".
- These will be entered in Maptician's desktop app. Then navigate to "API permissions" in the left navigation menu.
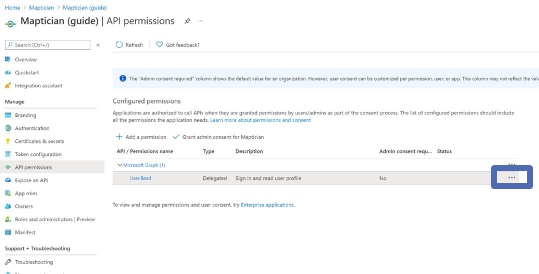
- By default, the app includes permission to read user profiles (in delegated mode).
- Click on the actions button (three dots) to the right of this permission entry.
- Delete this permission.
- Once the permissions list is empty, press the "Add a permission" button to create the necessary permissions for this app.

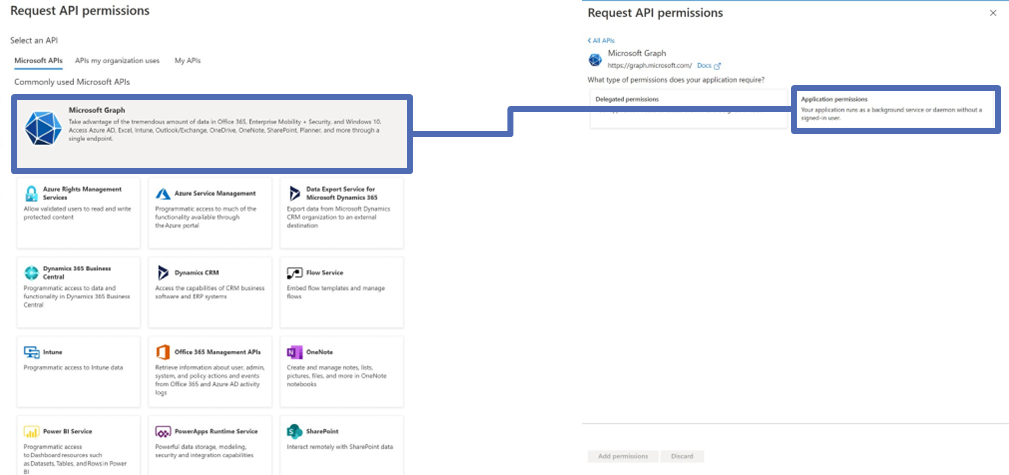
- In the Add permissions interface:
- Select the "Microsoft Graph" API button.
- Then select "Application permissions" as the type of permissions to be added.
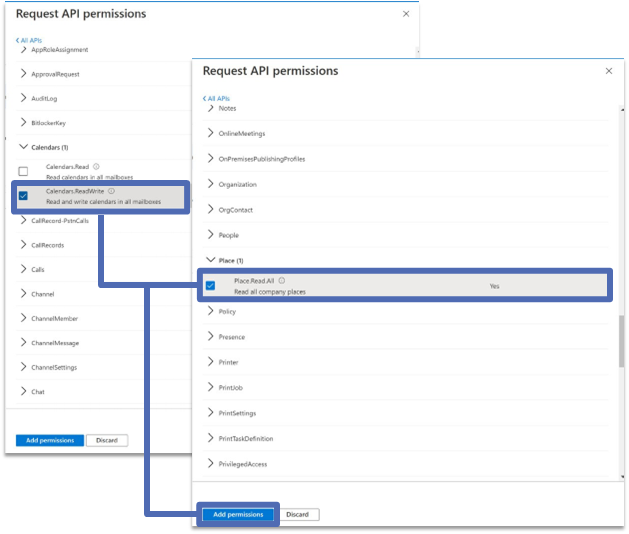
- In the Add permissions interface:
- Under Calendars, select "Calendars.ReadWrite".
- Under Place, select "Place.Read.All".
- When both of these are checked, press the "Add permissions" button at the bottom of the interface.
- Adding these permissions requires consent from your Azure administrator. If you are the administrator, press the "Grant admin consent for Maptician" button, or ask your administrator to grant consent through their account.
- Note: The access granted here includes all calendars in the organization which is more than is required for to sync room calendars. To restrict access exclusively to room resources, you can follow the MSFT PowerShell instructions in this Microsoft guidance document: https://docs.microsoft.com/en-us/graph/auth-limit-mailbox-access.

- Once the permissions have been granted:
- Select "Certificates & secrets" from the left navigation menu.
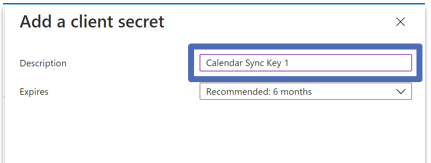
- Then press the "New client secret" button. This opens a dialog allowing you to create a secret used by Maptician to sync calendar information.

- Enter a description for the key.
- If you plan on rotating the key, it may be useful to indicate a date or version of the secret being created. You can change the expiration date of the secret which will determine how long the secret is valid for. If the secret expires, Maptician will no longer be able to sync or access any data. It is important to rotate to a new secret prior to the expiration date.
- Once these have been set, press the "Add" button.

- You will see the new secrets added to the client secrets section. Use the copy buttons for both the Secret Value and Secret ID and store these with the values from your app home screen.

- These values can be entered in Maptician's Settings interface, under the "Environment" menu. Once these values have been entered, press "Save Changes" to add them to your Maptician environment.
- Note: Maptician will not display your Secret Value once it has been saved and it is only available in the Azure interface for a short time. Please store this value in a safe place. For Maptician to utilize this connection for syncing calendars, please ensure the "Enable External Calendar Sync" option is enabled. This is also found in the "Environment" menu.These values can be entered in Maptician's Settings interface, under the "Environment" menu. Once these values have been entered, press "Save Changes" to add them to your Maptician environment.

-
Once connectivity has been established, in order for office rooms to sync with external calendars, you need to enable to sync for each room that you want to calendar sync.
- Under Locations click on "Manage Rooms". This will show the list of Rooms you have in Maptician.
- Under the Room column, click on the name of the room you want to configure. This will open the Room Information window.
- Click on the "Room Calendar" tab to configure the External Calendar Sync settings for the room

- Select Office 365, Uni-directional Email or GetJOAN for the Type of Calendar to Sync.
-
Enter the identifier for the external calendar - most frequently this is an email address.
-
External Calendar Sync is Active: Enable this option to activate the sync for the room.
-
- Once you have configured the above settings, click the green "Save Changes" button to complete the setup.
