How to add new seats to the map within the Map Editor tool.
Note: The steps for adding seats in the Map Editor tool may be followed for adding parking spaces, lockers, and assets as well.
Add a Seat to the Map: Option 1
- Navigate to the Map Editor tab.
- Select the location and map to open.
- Click Load.
- In the menu to the right, locate the Objects tab.
- Click into the Data tab.
- Click Seat.
- Click anywhere on the map to drop the seat in that location.
Timestamped Link: Map Editor Basics - Create a Seat 1

Add a Seat to the Map: Option 2
- Hover mouse arrow over the map canvas.
- On your keyboard, press CTRL + E.
- A seat appears. Use your mouse to move it to the desired location on the map.
- Right click on your mouse to place it.
Timestamped Link: Map Editor Basics - Create a Seat 2
Add a Seat to the Map: Option 3
- On the map, locate a seat you wish to duplicate.
- Click on the desired seat.
- On your keyboard, press CTRL + D.
- Right click on the duplicate seat and hold.
- Drag and drop it in the desired location.
Timestamped Link: Map Editor Basics - Create a Seat 3
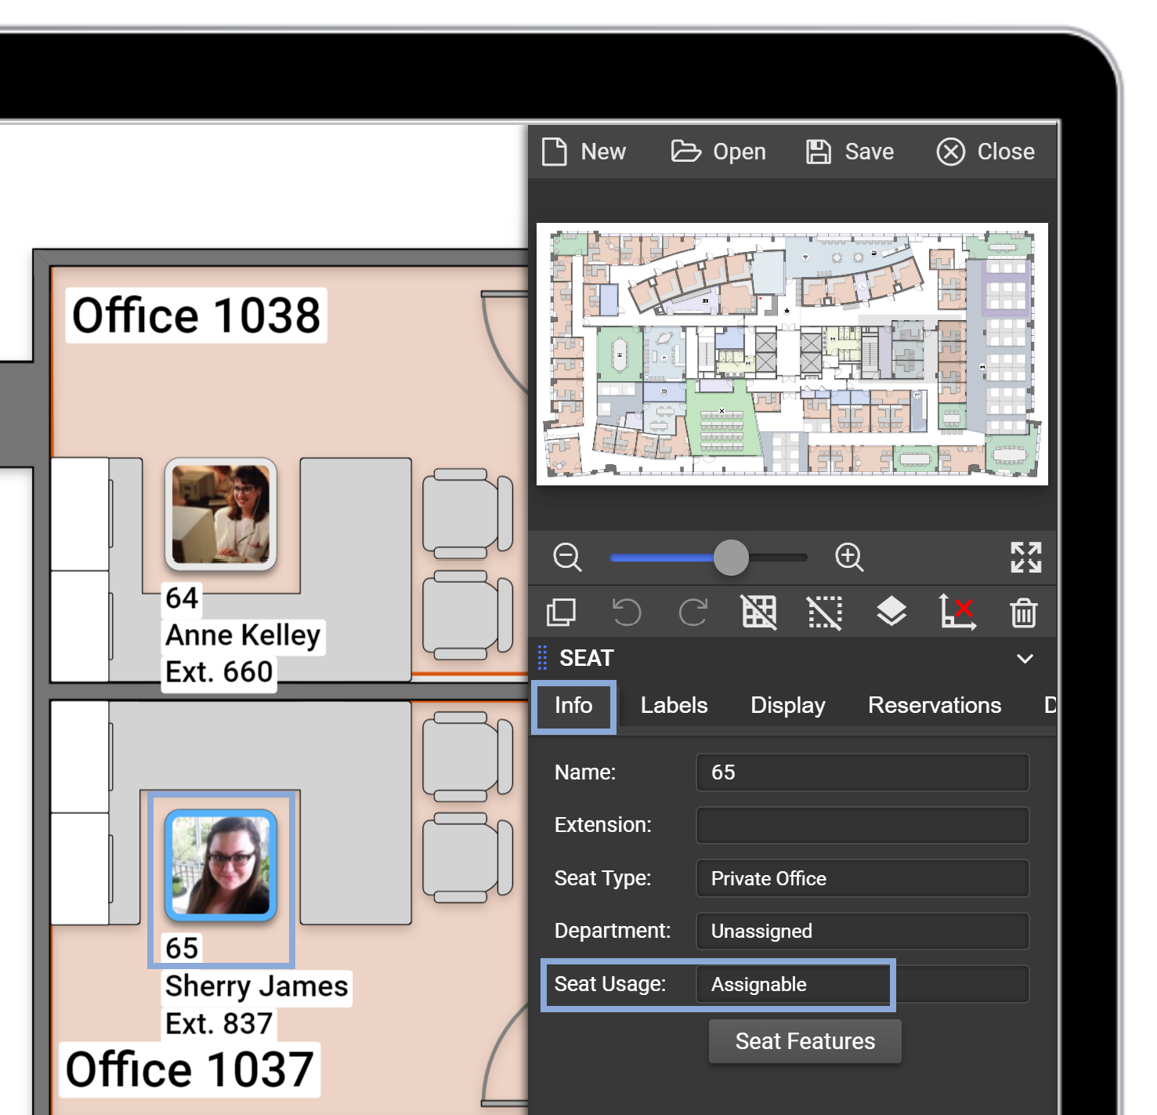
Apply a Department to a Seat
Note: Assigning a department to a seat is a way of labeling the seat. It does not restrict the seat to this department. Please see instructions on how to restrict a seat by department below.
- Click on the desired seat.
- In the Seat Menu to the right, click into the Info tab.
- Within the Department textbox, select the desired department.
- Save and close the map.
Timestamped Link: Map Editor Basics - Seat Department
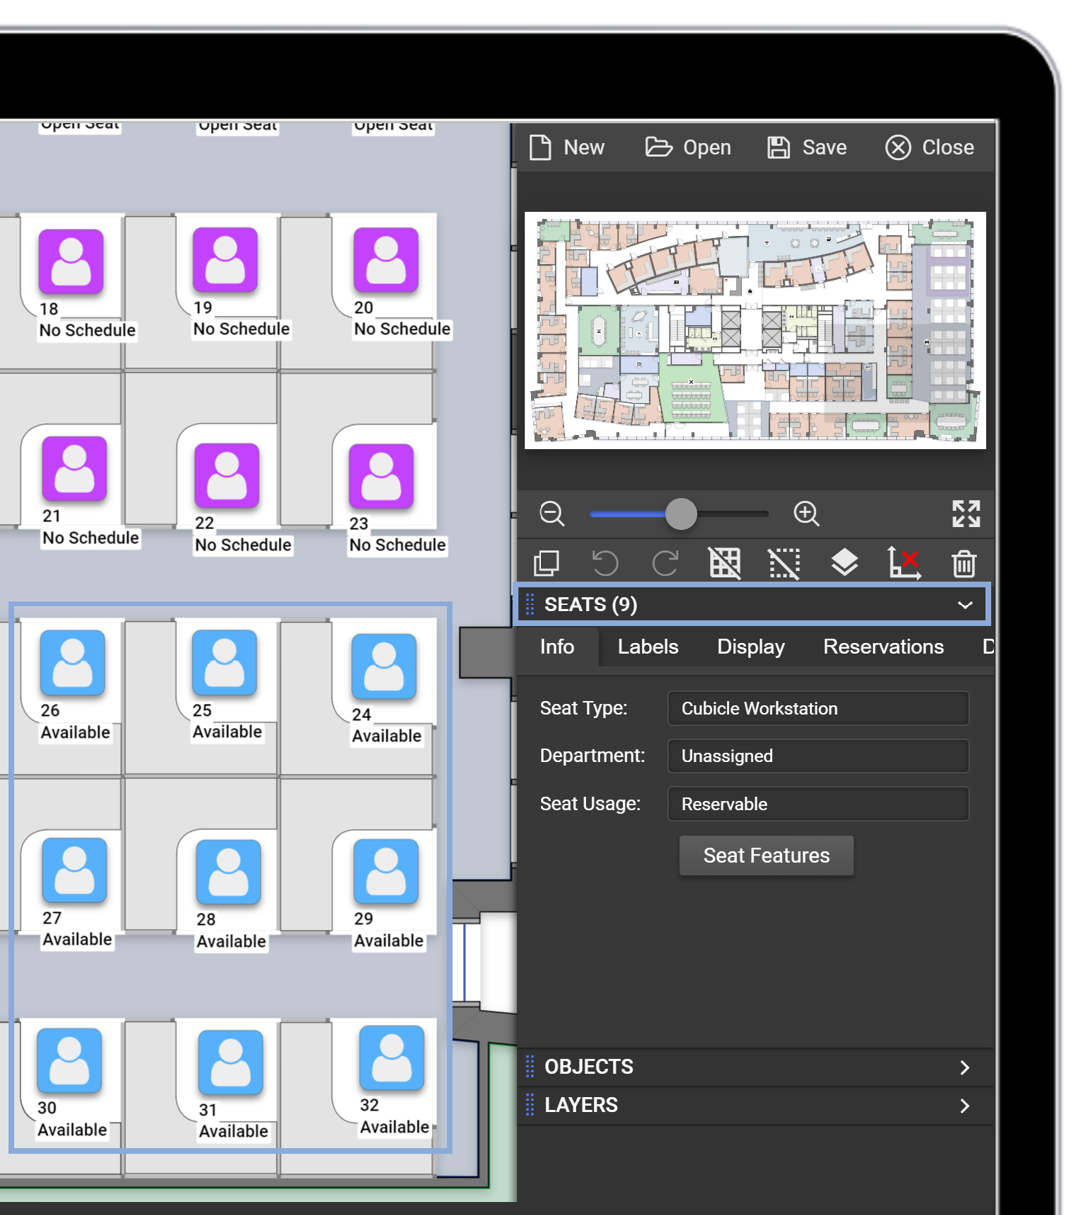
Change Seat Usage Type:
- Select the Seat of interest
- Locate the Seat Tab (Dynamic Tab)
- Locate the Info Tab
- Locate the Seat Usage textbox
- Select the appropriate Seat Usage type
- The new seat usage type will automatically update
Timestamped Link: Map Editor Basics - Seat Usage

Seat Display Settings
- Select the Seat of interest
- Locate the Seat Tab
- Locate the Labels Tab
- Select Label Visibility
- Select preferred text alignments
- Select which labels are needed
- Choose a label color
- Select Font size
- Locate the Display Tab
- Select the image size for the seat
Timestamped Link: Map Editor Basics - Seat Display Settings

Turn on Social Distancing:
- Select the Seat of interest
- Locate the Seat Tab
- Locate the Distancing Tab
- Select the Social Distancing checkbox
- Decide to use Color Warnings or not
- Decide Wall-Aware or not
- Decide if visible only in Editor/Assignments or not
- Edit the radius of the distancing ring
- Edit the color if desired
Timestamped Link: Map Editor Basics - Social Distancing

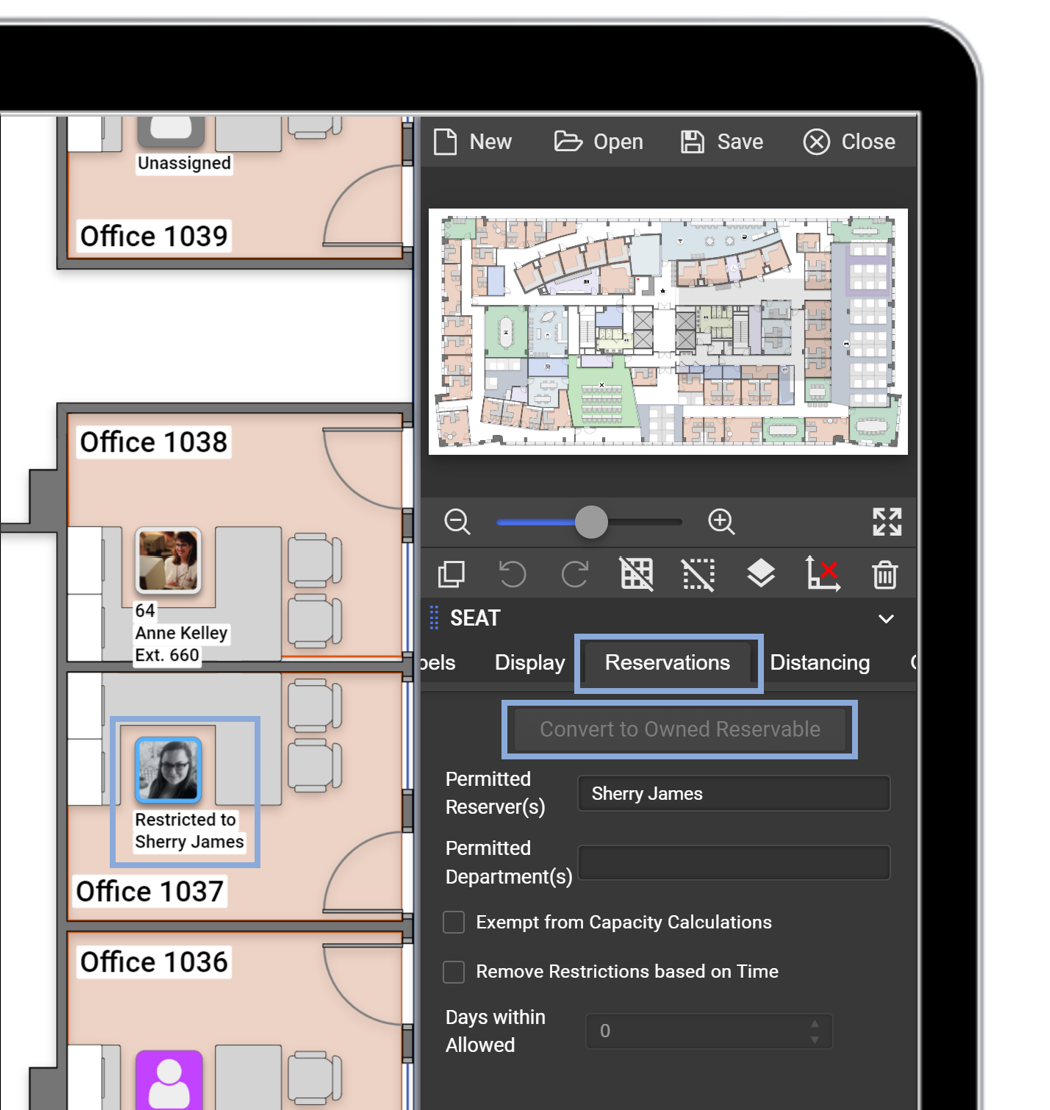
Restricted Reservations:
- Select the seat of interest.
- Locate the Seat Tab and make sure the Seat Usage is set to "Reservable".
- Locate the Reservations Tab.
- Select the Permitted Reserver(s) textbox.
- Select the person(s) allowed to reserve that seat.
- Click "Set" once the reservers are selected.
- Permitted Reserver(s) will automatically update.
Timestamped Link: Map Editor Basics - Restricted Reservable Seat


Convert to Owned Reservable:
- Seats must be assigned to occupants
- Select Seat of Interest
- Locate the Seat Tab
- Locate the Reservations Tab
- Select “Convert to Owned Reservable”
- Seat will automatically convert from Assignable use-type to Reservable use-type and will be restricted to that occupant for reservations
Timestamped Link: Map Editor Basics - Convert to Owned Reservable
Bulk Seat Edits
- Multi-select seats of interest
- Hold CTRL + Click seats of interest
- With all but the seats layer locked, left click and drag a box around the seats of interest
- SHIFT + S to select all seats on a floorplan
- Make needed bulk edits
- Seat Type
- Departments and Department Restrictions
- Seat Usage Type
- Label and Display Settings
- Distancing Rings
- Convert to Owned Reservable (if seats were already assigned to occupants)
Timestamped Link: Map Editor Basics - Bulk Seat Edits