How to add a room to your map in the Map Editor tool.
In Maptician, rooms are added to designate areas such as personal offices, conference rooms, break rooms and more. To add a new room to your map, follow the steps below:
- Navigate to the Map Editor tab.
- Click Load Map.
- Select the location and map you wish to open.
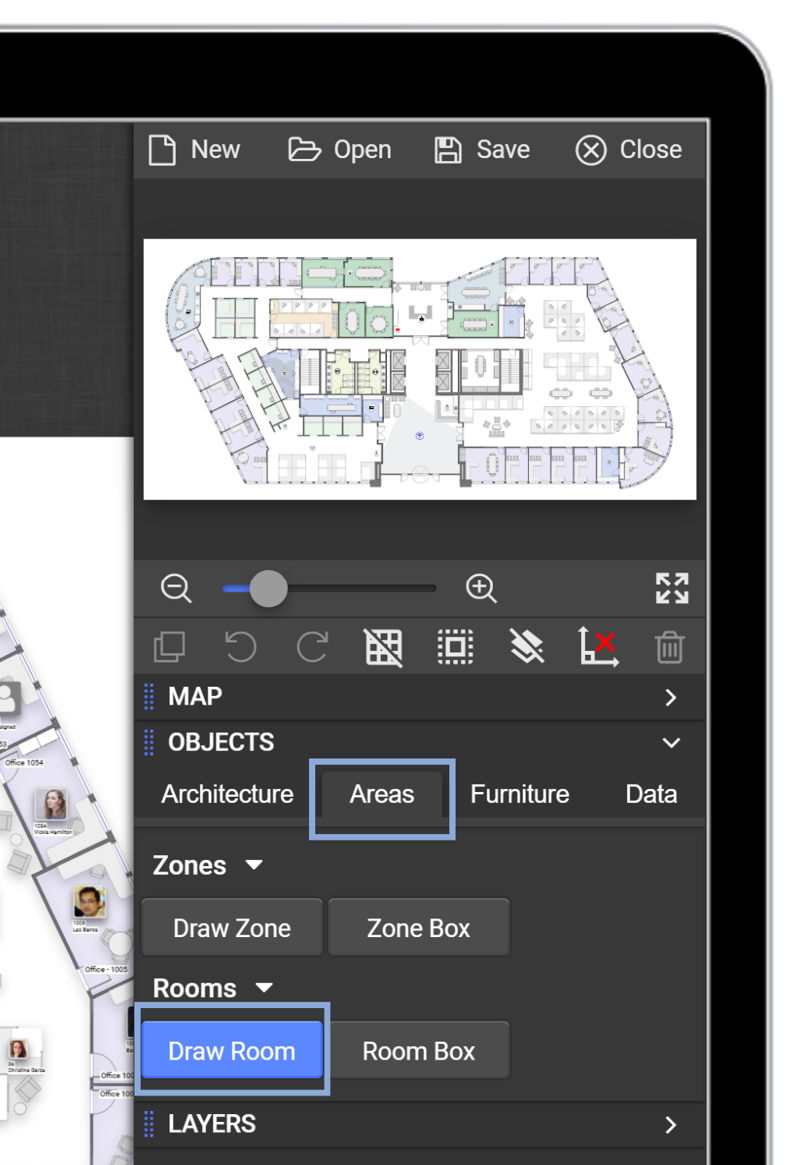
- In the menu to the right, navigate to the Objects tab.
- Click into the Areas tab.
- Click Draw Room.
- Left click on each corner to designate the room outline.
- Right click on the last corner to complete the room outline.
Timestamped Link: Map Editor Basics - Create a Room/Zone
Change Room Name:
- Select room of interest
- Locate the Room Tab (Dynamic Tab)
- Locate the Room Name textbox
- Type in desired room name
- Room name will automatically appear on the map
Timestamped Link: Map Editor Basics - Change Room Name
Change Room Type:
- Select room of interest
- Locate the Room Tab (Dynamic Tab)
- Locate the Room Type textbox
- Select desired room type from the drop-down menu
- Room type will automatically update for that room
Timestamped Link: Map Editor Basics - Change Room Type
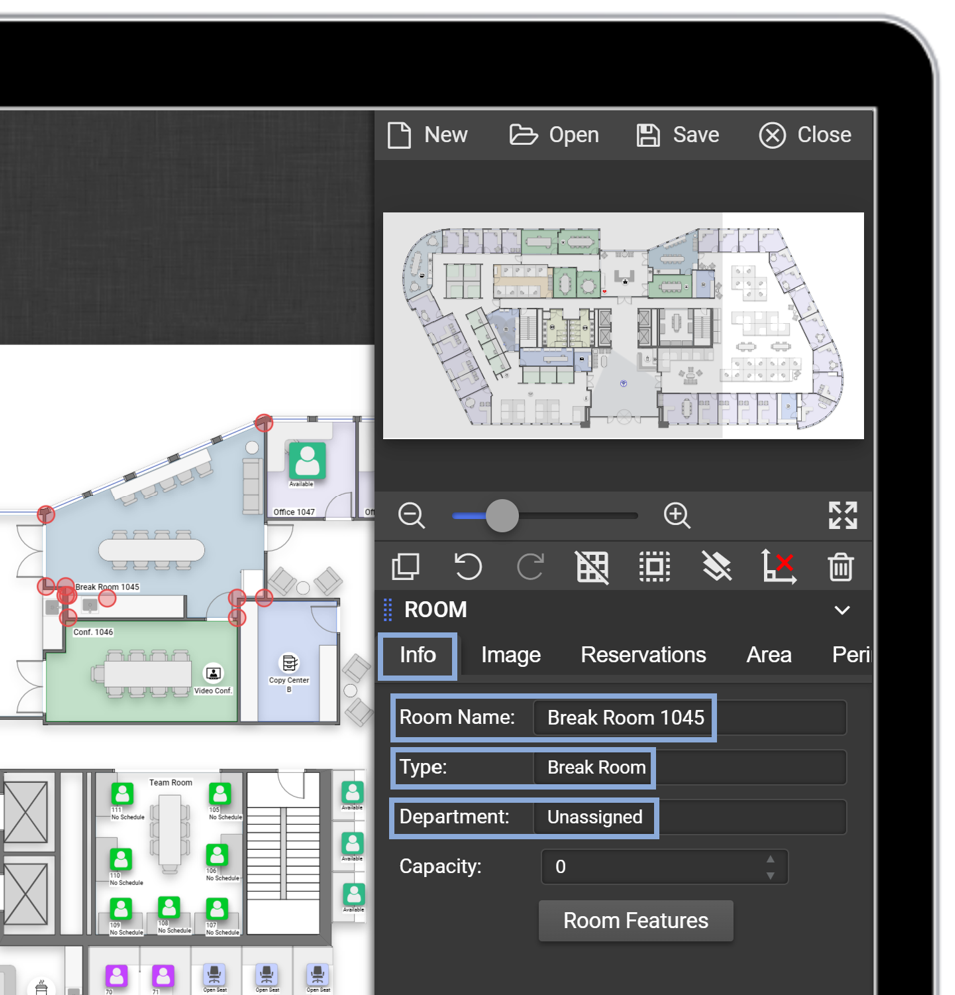
Change Room Department:
- Select room of interest
- Locate the Room Tab (Dynamic Tab)
- Locate the Room Department textbox
- Select desired department type from the drop-down menu
- Department type will automatically update for that room
Timestamped Link: Map Editor Basics - Change Room Department
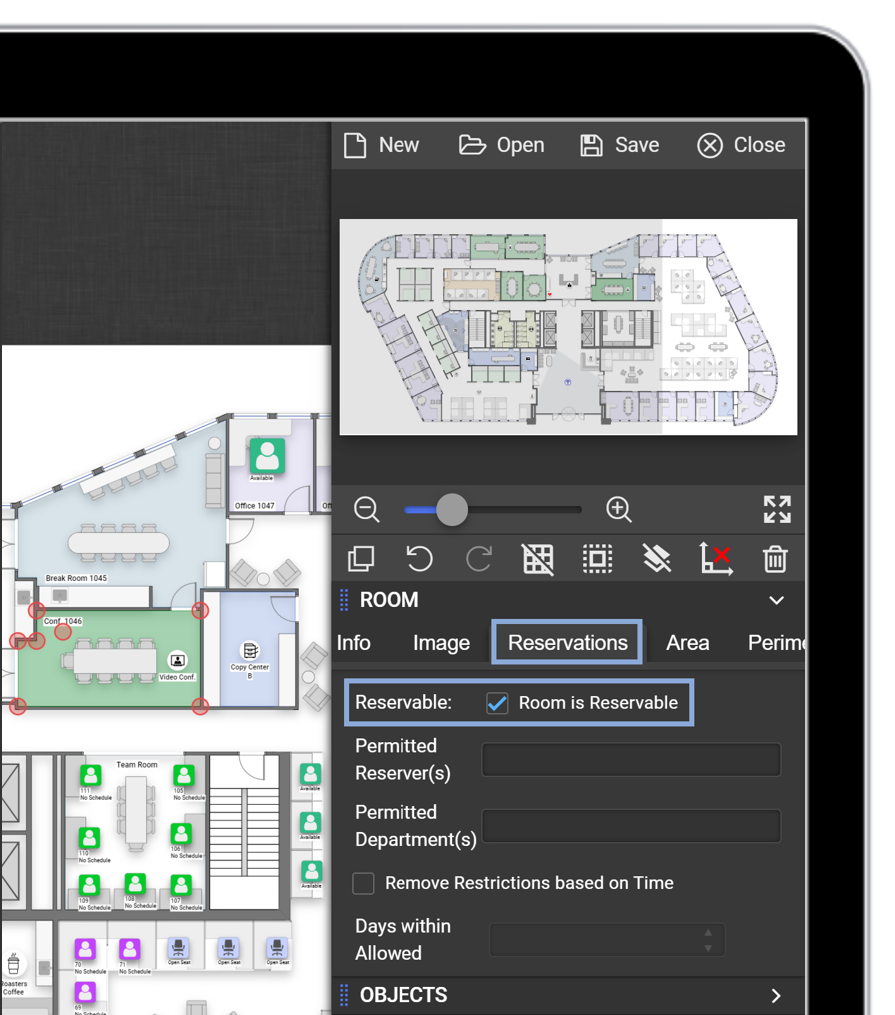
Room Reservable Status:
- Select room of interest
- Locate the Room Tab (Dynamic Tab)
- Locate the Reservable checkbox
- Check if you’d like to make the room reservable or not
Timestamped Link: Map Editor Basics - Reservable Room
Set Room Capacity:
- Select room of interest
- Locate the Room Tab (Dynamic Tab)
- Locate the Capacity textbox
- Type in desired room capacity
Timestamped Link: Map Editor Basics - Room Capacity

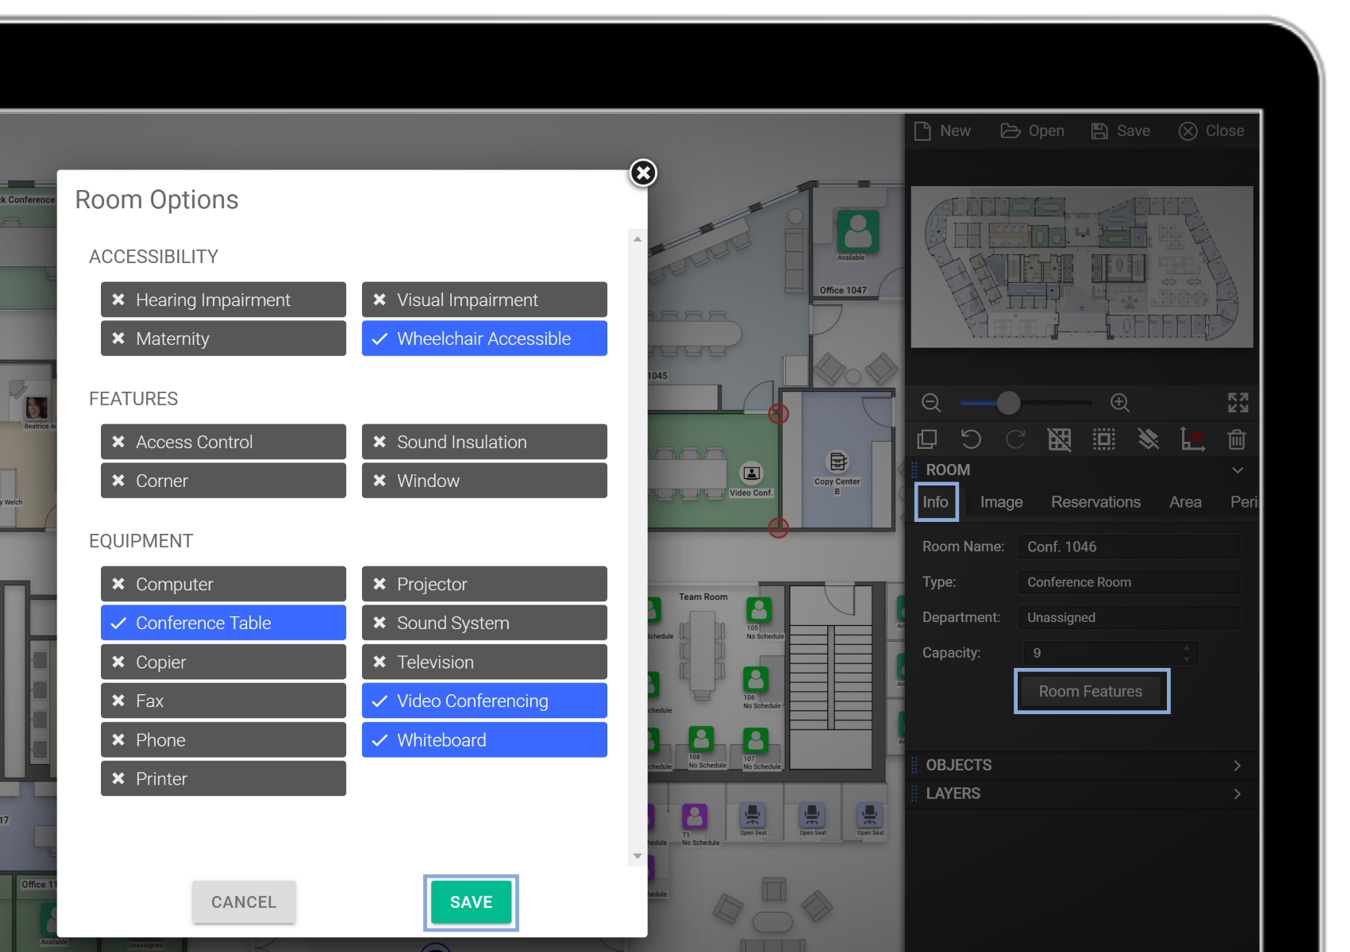
Set Room Features:
- Select room of interest
- Locate the Room Tab (Dynamic Tab)
- Select “Room Features”
- Select Features and Equipment present in the room
- Gray means not applicable or unknown
- Blue means applicable to that room
Timestamped Link: Map Editor Basics - Room Features
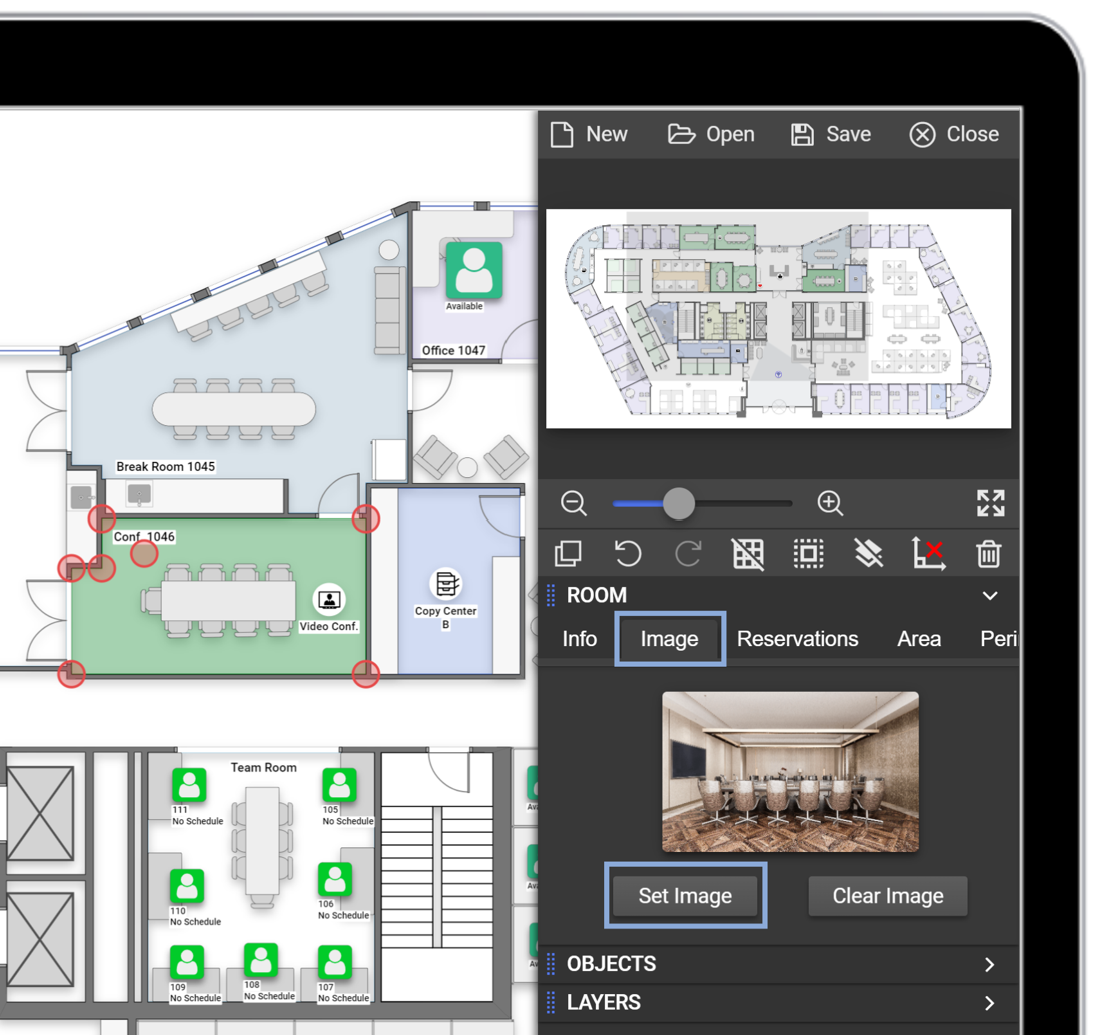
Add a Room Image:
- Select room of interest
- Locate the Room Tab (Dynamic Tab)
- Locate the Image Tab
- Select “Set Image”
- Select “Upload Image”
- Choose an image from your files
- Select “Set”
- To clear the image, select “Clear Image” – located beside “Set Image”
Timestamped Link: Map Editor Basics - Room Image
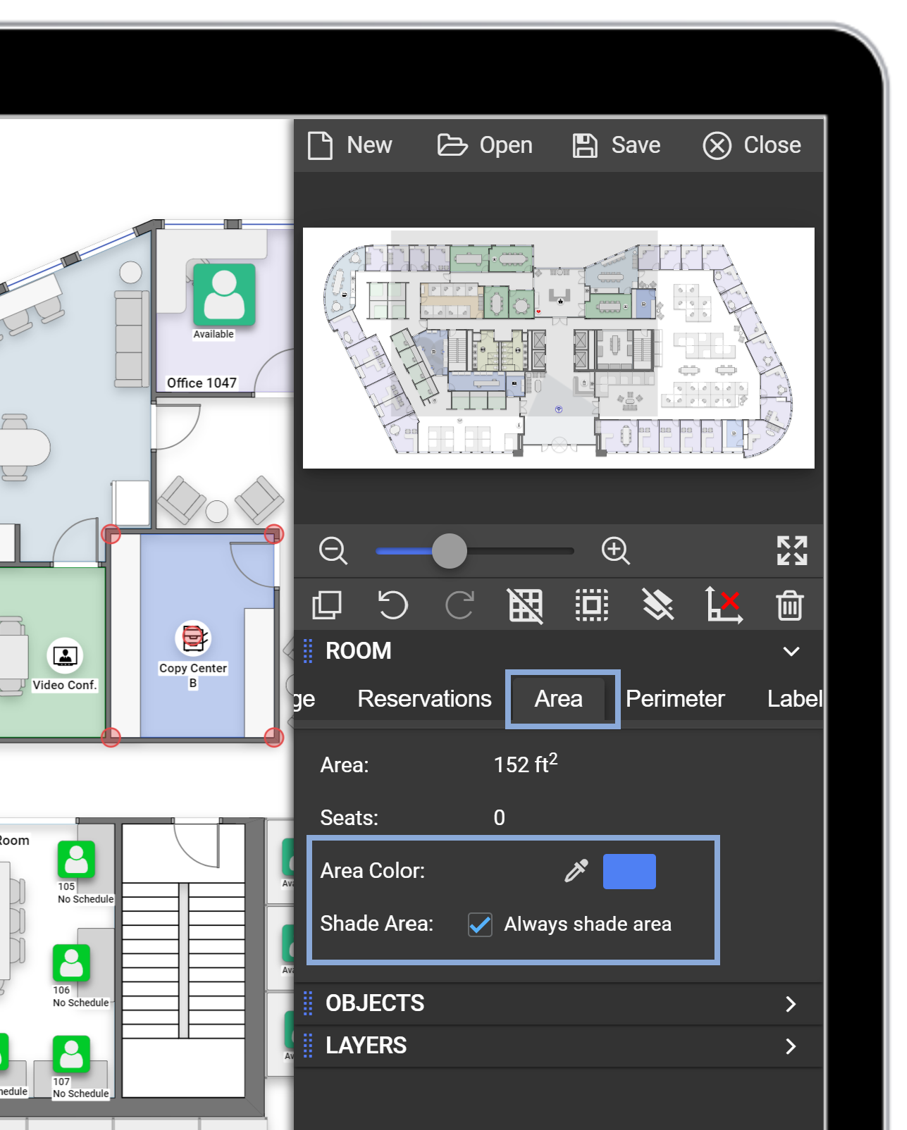
Change Room Color:
- Select room of interest
- Locate the Room Tab (Dynamic Tab)
- Locate the Area Tab
- Select the color selector
- Choose a color
- Press “Enter” or click out of the color selector by clicking on the gray-space in the left-navigation menu
- Choose to “Always shade area” or not
Timestamped Link: Map Editor Basics - Room Color
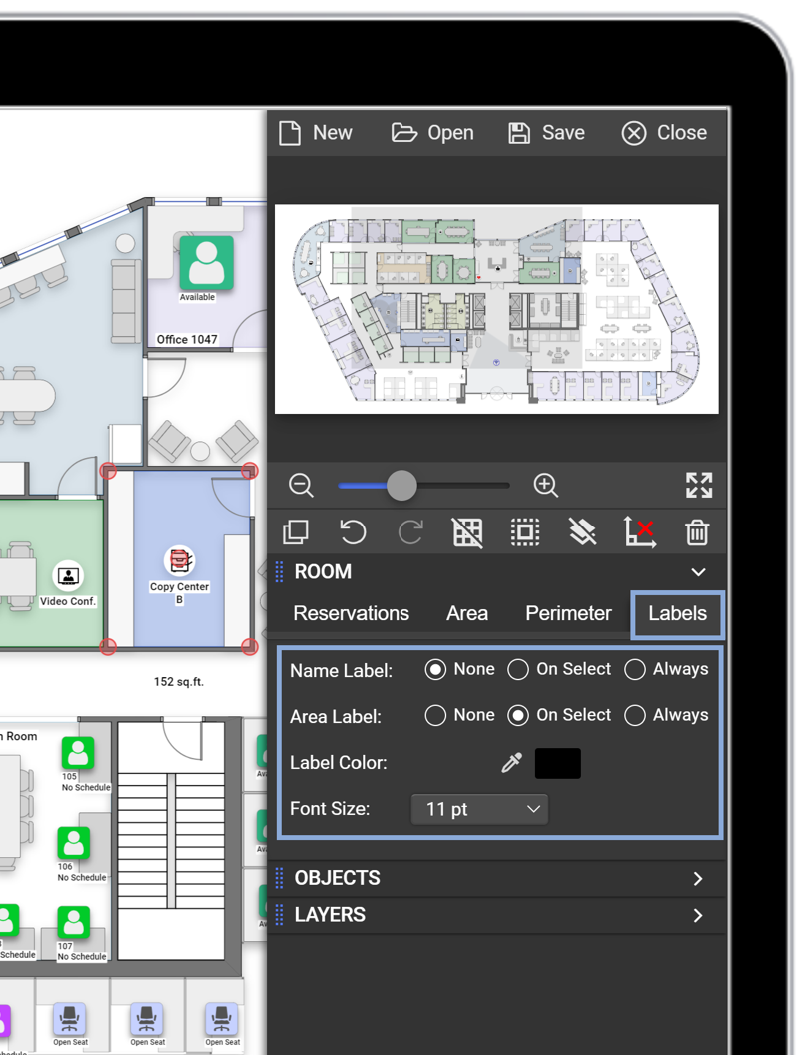
Change Room Label Size and Color:
- Select room of interest
- Locate the Room Tab (Dynamic Tab)
- Locate the Labels Tab
- Select the Font Size drop-down menu
- Select desired font size
- Label color selector is located here too
Timestamped Link: Map Editor Basics - Room Label Edits